 To see all of my photography posts, click here.
This post is a collaboration with my husband Will, who used to be a scientist and now is a librarian, and so has been organizing information in one form or another for many years. He came up with our photo organization system after taking inspiration from Andy Defrancesco with the general mindset of not having to rely on any third party software to keep things sane and findable. I have taken this “tiered foldering” method and adapted it for other purposes over time, so I wanted to share it here.
It is simple, but incredibly effective, and in the age where our images mostly live in our computers, essential for archiving.

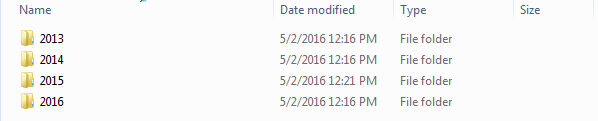
1. Within your main image folder (“My Photos” is just fine), create a folder for each year that you have photos for.
 2. Within each year, create individual folders for each event. The folder naming is important, to make sure everything is in the proper order.
Naming convention is:
YEAR(space)MONTH(space)DAY(space)EVENT DESCRIPTION
Remember to put a zero in front of the single-digit months, this keeps the sorting correctly ordered when you add folders for quarter 4.
 3. Within each event folder, I drop the images from that event. In addition, since I edit my photos, I create sub-folders to contain my edited photos, as well as those edited photos optimally sized for using on the blog.
I have also at times used sub-folders to sort out the photos that I feel comfortable sharing on social media from the ones I would like to keep private. I don’t believe in deleting any photos, no matter how unflattering or weird – they are all memories of a time in your life.
It is important to remember that you are not taking photos for Facebook. You are taking photos to remember something. Do not only take photos you are comfortable showing to that random dude from 10th grade English class. This only applies to photos you SHARE. Don’t delete!
However, to make the uploading to Facebook easier, go ahead and create a sub-folder called “Facebook” (or your preferred social network) and put the photos you wish you share there. It will be so much easier.
Additional tips:
- If you have multiple cameras, or a camera and a phone that is taking photos, take the time to move the cameras onto your computer and sort them properly. I did not do this properly and I still have more files to go through. I do, however, move all photos from my phone into the Photos folder, in a file called “2016 05 06 iPhone Photo Dump” which will ensure that even though they aren’t sorted, they ARE in the correct location to be picked up by our cloud backup, and so they will be safe.
- BACK IT UP! I’ve written about it before, and we now have a cloud backup service to ensure that we won’t lose our image files. Do not rely on a single location to ensure that your memories are safe.
- Related: Facebook is NOT a dependable photo storage solution.
There you have it! As I mentioned, it’s pretty simple, but the difference in managing your photos will be significant – especially when you are looking for something from a few years ago. Happy filing!